


 1913
1913
 Administrator
95
kalata
27
tsveti05
25
nadeto
18
Fifa_blg
13
bebkabebeto
8
lizard
7
zlostur
5
rackitt
5
Yanitsa (sun)

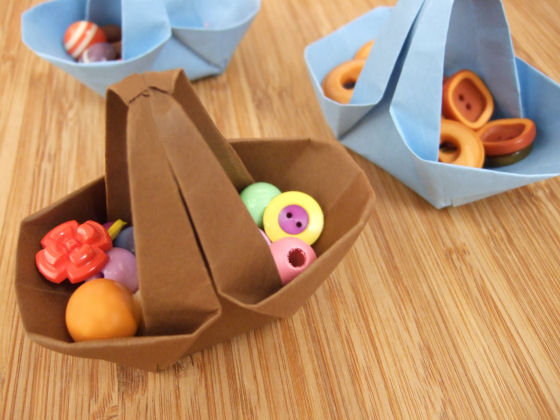
НАПРАВИ СИ САМ
Описание:

1. With a piece of square, fold diagonally on each side to get the creases. Unfold.
2. Bring 2 triangles to the centre.
3. Fold in half, as shown.
4. From the pointed end C, fold a triangle inwards, as shown. It shouldn’t align with the centre crease.
5. Repeat step 5 on the opposite side.
6. Turn over. Repeat steps 5-6 and ensure that the top + bottom triangles are aligned at where the arrows are pointing.
7. Open up. Use a ruler to get that white dotted line.
8. Fold in a triangle under the white dotted line.
9. Bring fold #1 to the blue dotted line. Crease well. Unfold.
10. Repeat step 10 for fold #2-4. As shown, newly added dotted lines represent the new creases formed. At this point, you might want to use different coloured pens to mark every crease line.
11. Make 2 vertical creases indicated by the arrows.
12. Turn over. Make creases from the underside more prominent on this current side.
13. Then turn over. Identify line D.
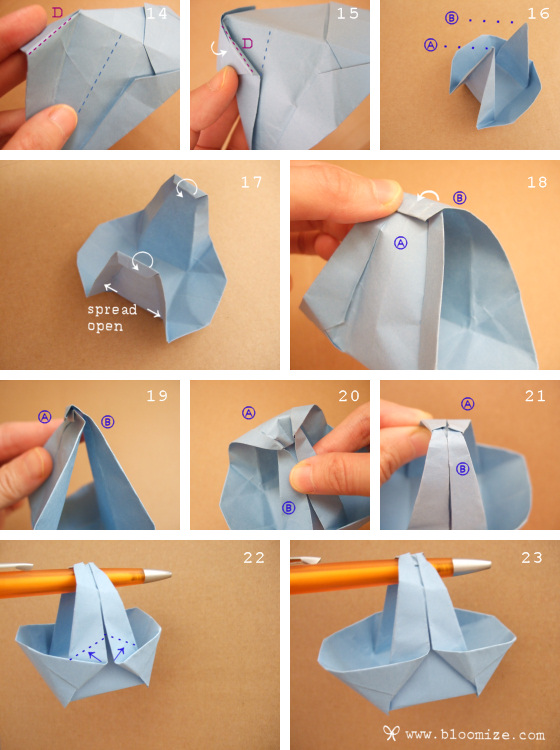
14. Crease it.
15. Then bring the fold along D inwards, as shown.
16. Repeat steps 14-16 on 3 other sides. You’ll get a base with peaks A and B.
17. Spread open the triangles of A and B, then make 3 tiny folds forward.
18. Bring B over to A.
19. Hook B’s fold onto A’s.
20. Fold back the triangles beginning with B first.
21. Followed by A to complete the locking.
22-23. To make wider, bring the bottom part of the handle up to
where the arrows are pointing.


